How to Style the Divi Theme Pricing Table Modules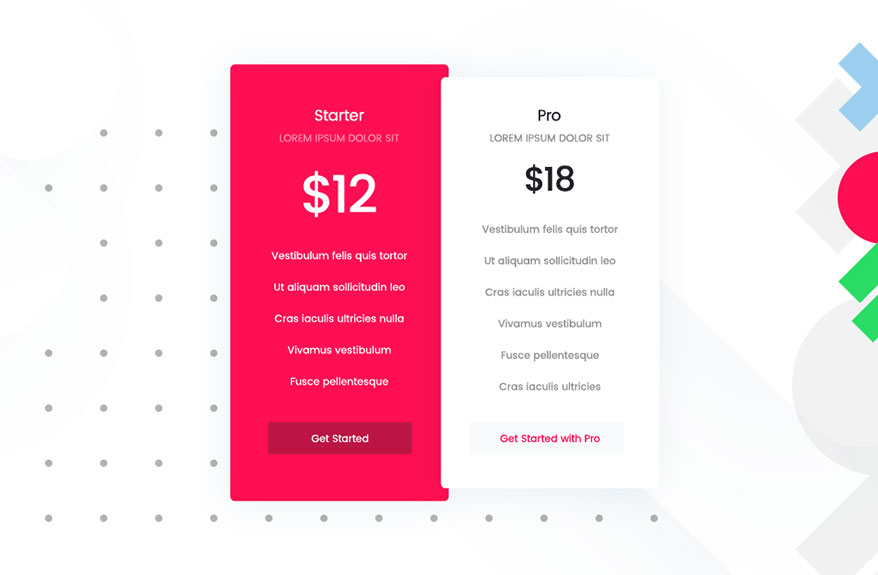
For Divi Theme and Divi Builder users. This free tutorial on How to Style Divi Theme Pricing Table Modules has been made to help you work more quickly and save you time and money. In an easy to follow tutorial that you can come back to any time you get stuck you will find useful ‘how to’ instructions.
Introduction
In this tutorial, you will learn how to create good looking Divi Theme Pricing Table Modules. The tutorial will be separated into several sections. The main sections you are going to learn about are:
- Creating a Section
- Customising a CTA Module
- Customising a Pricing Table Module
Creating the Section Structure
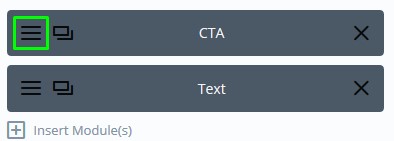
Create a section 1/3 + 2/3. In the first column add two CTA modules. In the latter one, add the Pricing Tables module, as shown in the image below:

Section structure
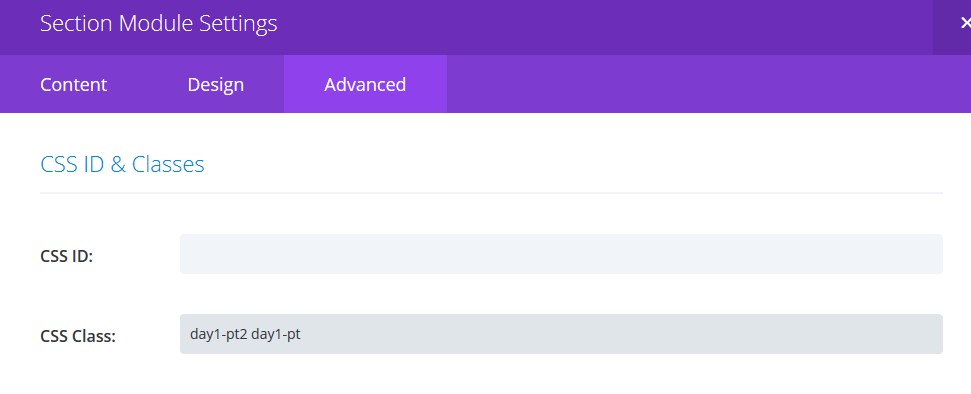
Add the class
Click the section settings icon and add the class: day1-pt2 day1-pt. Now it should look like this:
Section class
Add the CSS
Now that we have added the class let’s also add some CSS. While you are on the edit page screen, in your Divi Builder, click the settings icon:

Page settings
Then, paste this CSS:
.day1-pt .et_pb_pricing_content .et_pb_pricing li span:before {
 display: none !important;
}

#page-container .day1-pt .et_pb_button_wrapper a.et_pb_pricing_table_button {
 padding: 11px 5px !important;
}

.day1-pt2 .et_pb_pricing_table.et_pb_featured_table .et_pb_dollar_sign {
 color: #fff !important;
}

.day1-pt .et_pb_row {
 width: 95% !important;
}

.day1-pt2 .et_pb_promo .et_pb_button_wrapper {
 margin-top: 40px !important;
}

.day1-pt2 .et_pb_button_wrapper {
 margin: 0 0 0;
 padding: 0 !important;
}

.day1-pt2 .et_pb_column_2_3 {
 width: 57.1% !important;
}

.day1-pt2 .et_pb_column_1_3 {
 width: 33.666% !important;
 margin-right: 9.2% !important;
}

.day1-pt2 .et_pb_pricing_table {
 padding: 2.4vw 3vw 2.6vw !important;
}

.day1-pt2 .et_pb_pricing_table.et_pb_featured_table {
 padding: 3.5vw 2.9vw 3.9vw !important;
}

.day1-pt2 .et_pb_pricing_table:not(.et_pb_featured_table ) {
 margin-top: 1.1vw !important;
}

.day1-pt2 ul.et_pb_pricing li {
 margin-bottom: 13px;
}

.day1-pt2 .et_pb_pricing_table.et_pb_featured_table .et_pb_dollar_sign,
.day1-pt2 .et_pb_pricing_table.et_pb_featured_table .et_pb_sum {
 font-size: 82px !important;
}

#page-container .day1-pt2 .et_pb_pricing_table.et_pb_featured_table a.et_pb_pricing_table_button:hover {
 color: #bc1544 !important;
 background-color: #fff !important;
}

#page-container .day1-pt2 .et_pb_pricing_table.et_pb_featured_table a.et_pb_pricing_table_button {
 color: #fff !important;
 background-color: #bc1544 !important;
 border: none !important;
}


/*Responsive*/

@media only screen and (min-width: 1930px) {
 .day1-pt2 .et_pb_pricing_table.et_pb_featured_table {
 padding: 64px 40px !important;
 }
 .day1-pt2 .et_pb_pricing_table {
 padding: 40px !important;
 }

.day1-pt2 .et_pb_pricing_table:not(.et_pb_featured_table ) {
 margin-top: 22px !important;
 }
}

@media only screen and (max-width: 1390px) {
 .day1-pt2 .et_pb_column_1_3 {
 width: 33% !important;
 margin-right: 3% !important;
 }

.day1-pt2 .et_pb_column_2_3 {
 width: 64% !important;
 }
}

@media only screen and (max-width: 980px) {
 .day1-pt2 .et_pb_promo .et_pb_button_wrapper {
 margin-top: 0px !important;
 }

.day1-pt2 .et_pb_column_1_3 {
 width: 100% !important;
 margin-right: 0% !important;
 }

.day1-pt2 .et_pb_column_2_3 {
 width: 100% !important;
 }

.day1-pt2 .et_pb_pricing_table.et_pb_featured_table {
 padding: 4.9vw 2.9vw 4.9vw !important;
 }

.day1-pt2 .et_pb_pricing_table:not(.et_pb_featured_table ) {
 margin-top: 2vw !important;
 }

.day1-pt2 .et_pb_column:first-child {
 margin-bottom: 40px !important;
 }

.day1-pt2 .et_pb_promo .et_pb_promo_description h2 {
 padding-bottom: 15px !important;
 }

.day1-pt2 .et_pb_promo:first-child .et_pb_promo_description h2 {
 padding-bottom: 9px !important;
 }
}

@media only screen and (max-width: 767px) {
 .day1-pt2 .et_pb_promo .et_pb_promo_description p,
 .day1-pt2 .et_pb_promo .et_pb_promo_description h2 {
 text-align: center !important;
 }

.day1-pt2 .et_pb_pricing_table {
 width: 100% !important;
 max-width: 400px;
 margin: 0 auto !important;
 float: none;
 margin-top: 0 !important;
 margin-bottom: 0 !important;
 }

.day1-pt2 .et_pb_pricing_table.et_pb_featured_table .et_pb_dollar_sign,
 .day1-pt2 .et_pb_pricing_table.et_pb_featured_table .et_pb_sum {
 font-size: 52px !important;
 }

.day1-pt2 .et_pb_pricing_table.et_pb_featured_table,
 .day1-pt2 .et_pb_pricing_table{
 padding: 40px !important;
 }

.day1-pt2 ul.et_pb_pricing li {
 margin-bottom: 0px;
 }

#page-container .day1-pt2 .et_pb_pricing_content {
 padding: 0 0 30px !important;
 }

.day1-pt2 .et_pb_promo .et_pb_button_wrapper {
 text-align: center !important;
 }

.day1-pt2 .et_pb_pricing_table:not(.et_pb_featured_table ) {
 margin-top: 30px !important;
 }


 #page-container .day1-pt2 .et_pb_pricing_heading {
 margin-bottom: 20px !important;
 }

#page-container .day1-pt2 .et_pb_pricing_content_top {
 padding-bottom: 12px;
 }

}

@media only screen and (max-width: 480px) {
 .day1-pt .et_pb_row {
 width: 90% !important;
 }

.day1-pt2 .et_pb_pricing_table.et_pb_featured_table,
 .day1-pt2 .et_pb_pricing_table{
 padding: 25px !important;
 }
}
Into Custom CSS box:

Custom CSS box
Click Save.
Click the Row Settings icon:

Row settings
Select the Design Tab in the Divi Builder and set these options:
- Use custom width – Yes, then set width to 1170px
- For Column1 Padding, add 7.1vw value to Top option
Designing the first CTA
In your Divi Builder, click your first CTA module settings button.
CTA settings
In the Content Tab:
- Add Title
- Set Background to – No
In the Design Tab:
- Set Text Orientation to left
- Change Title color to #a7a7a7
- Change font to Lato
- Change font size to 16px
In the Advanced Tab:
You need to add a bit of CSS code here.
In the Promo Description field, paste this CSS:
padding-bottom: 0;
In the Promo Title field, paste:
padding-bottom: 27px;
Designing the second CTA
This CTA is going to be more detailed than the first one. Fill in all the fields. Title, Button text and URL and Content.
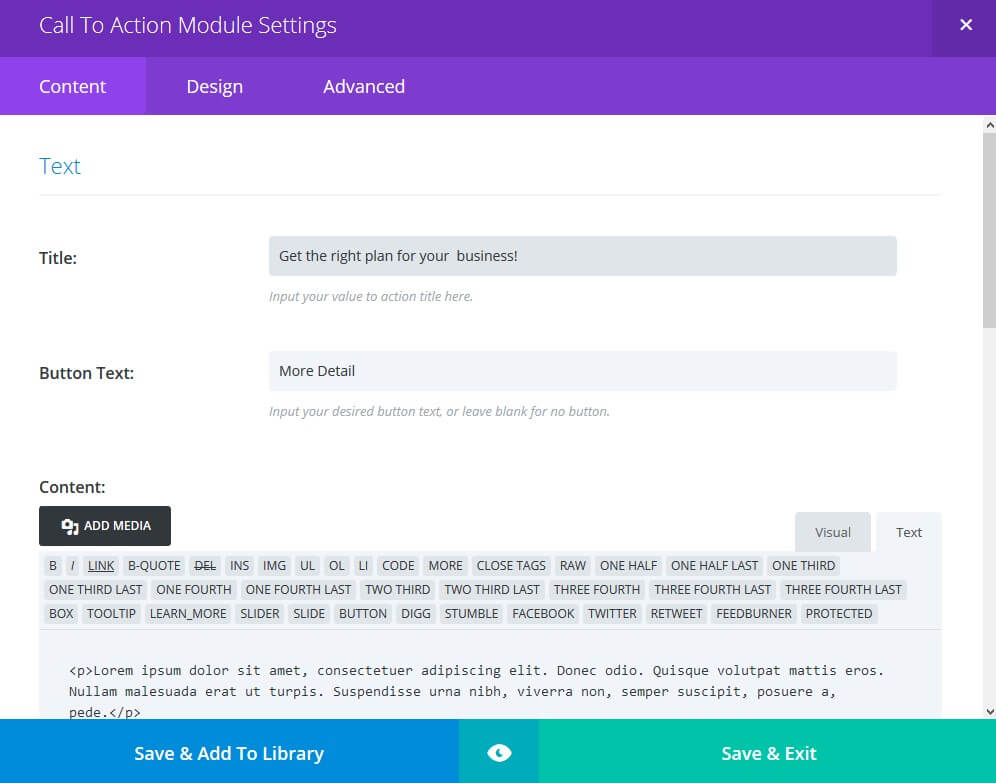
CTA content
Also, set Background to No.
That was for the Content tab.
For the Design tab, set this option:
- Text orientation should be left
- Title font to be Poppins and font weight bold
- Title size 36px, colour should be black
- Add letter spacing of 1px too
- Set Title line height to 120%
- For body text, choose Lato, Regular, 16px with colour: #a7a7a7
Also, enable Button Custom Styles option. Then, set this option for the button:
- Button text size to be 18px
- White text colour
- Background colour to: #ff0f53
- Border width to 1px and colour #ff0f53 with radius 27px
- Disable option to show button icon
- Font to Poppins and font weight to be Medium
- Hover colour should be #bc1544, both background and border colour
- Hover text colour remains white
- Hover border radius should be as same as 27px
- Button alignment to left
Now select the Advanced Tab.
Here you need to add bits of CSS code.
Add this to the Promo button:
padding: 12px 46px !important;
And also this for the Promo title:
  font-weight: 400;
  padding-bottom: 38px;
Designing the Divi Theme Pricing Table Modules
First, add two tables by clicking “Add New Pricing Table” button. I created two tables and named them “Starter” and “Pro”.
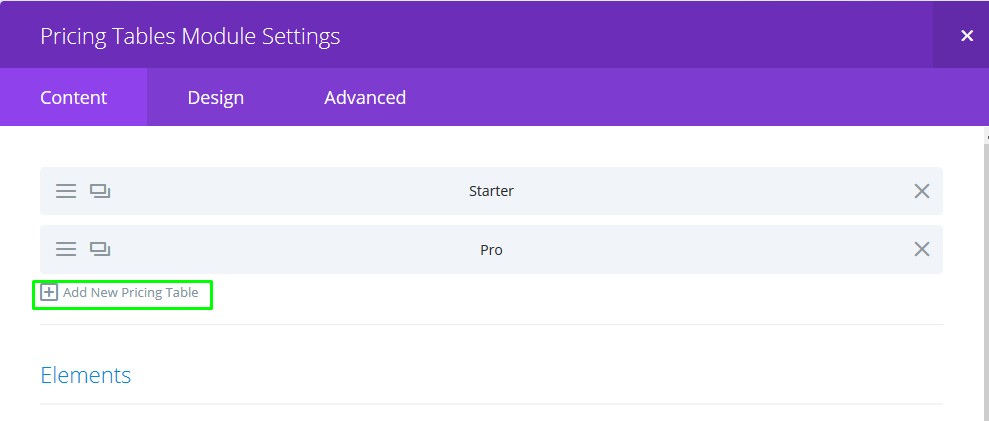
Adding new Pricing Tables
Once you have added tables, click the settings button to edit them. Add subtitle, currency, price, button text and of course content. Do this for both tables.
Also, add Button URL to hyperlink the buttons.
Now that we have content ready, select the Design Tab to make it look better.
Use these here options:
- Set Center items to – Yes
- Featured colour to #ff0f53
- Show Featured Table Drop Shadow – No
- For text, set Text Orientation to Center
- Table Header Background Colour: rgba(0,0,0,0)
- Make Title: Poppins, centered, black, 24px, regular
- Body text should be Poppins, regular, 16px, #8d8d8d with body line height of 24px
- Featured Table Header Text Colour: #fffff
-
rgba(0,0,0,0)
- Featured Table Body Text Colour: #ffffff
- Subheader text: Poppins, Regular, 16px, black, line height 1em
- Currency and price text: Poppins, Regular, white, 52px
- Button: background #ff0f53. font white 16px, centered. You can use the same hover options as before
- Button border-width should be 1 and border colour #f8fafb, border-radus to 0.
- Set width to 100%
- Border width to 1px #bebebe
In Advanced Tab:
To the Pricing Heading add:
padding: 0 !important;
margin-bottom: 27px;
To the Pricing Title add:
padding-bottom: 13px;
font-weight: 500;
To the Pricing Subtitle add:
font-size: 16px;
To the Pricing Top:
border-bottom: 0 !important;
padding-bottom: 35px;
Currency:
margin-left: 0 !important;
position: static !important;
Pricing Content:
padding: 0 0 1.3vw;
Pricing Item:
padding: 0 !important;
list-style: none !important;
line-height: 230%;
And lastly, for the Pricing Button:
width: 100% !important;
padding: 11px 0 !important;
I just added some general design elements but let’s now stylize the two tables I created.
Select the first one you created and switch to Design tab.
- Make this table featured.
- Subheader: Lato, Regular, 16px, colour: rgba(255,255,255,0.5)
- Currency & Price: Poppins, Medium, 82px
- Set border width to be 0px
- Border radius should be 7px
- Center the button position
- Also, enable box shadow:
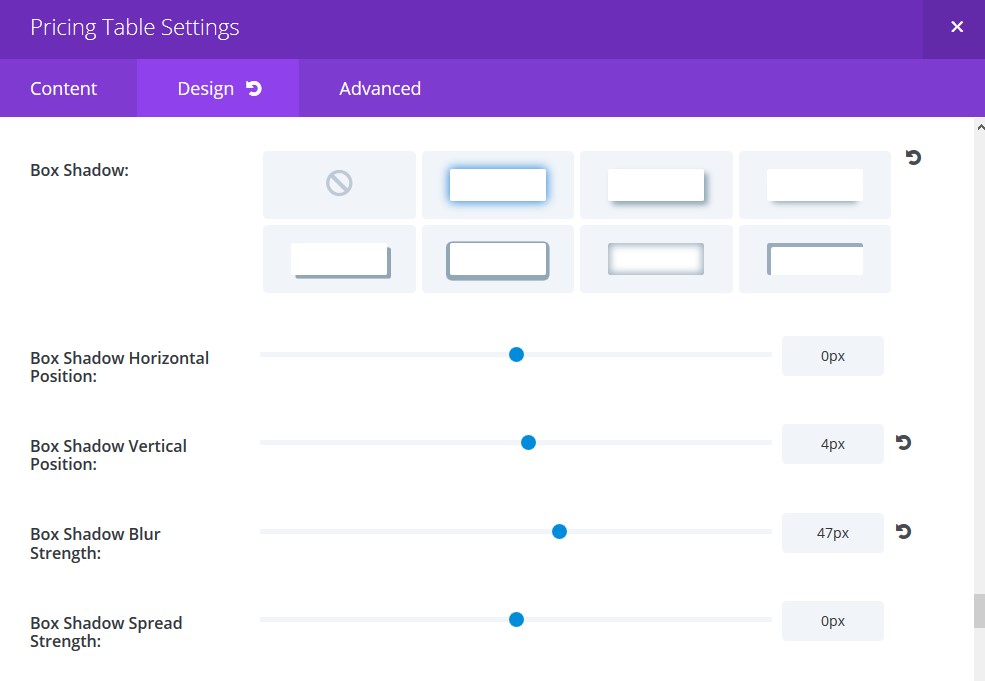
box-shadow
Switch to the Advanced Tab now.
In the Pricing Heading field, add:
margin-bottom: 36px !important;
In the Pricing Content:
padding: 0 0 1.7vw!important;
Let’s edit the second table as well:
Open module settings, then second table settings and select Design Tab.
- Title: Poppins, Regular, 24px
- Body text: Poppins, Regular, 16px, body line-height: 24px
- Subheader text: Poppins, Regular, uppercase, centered, 16px
- Currency and Price: Poppins, Medium, 52px
- Use Custom Styles for the button
- Make button white with text colour: #ff0f53
- On hover, make the button text black and the background to white, use no borders
- Rounded corners 7px each
- Border width: 0px
- Enable Box shadow and use same values as for the first table
Advanced Tab settings:
Main Element CSS:
margin-left: -10px !important;
z-index: 10 !important;
That’s it, all done! Hope you enjoyed this ‘How to Style Divi Theme Pricing Table Modules’ tutorial. Feed-back is welcome. Use our Support page to send through suggestions or queries.
For more tutorials click here